Tips for Freezing and Thawing Foods

by Jyl Steinback
Freeze-Safe Tips:
Freezer temperatures should never go above 0°F; fluctuating temperatures can affect the quality of frozen foods.
Supermarket wrappings are safe for most foods frozen 1 to 2 months, but for best quality, overwrap packages with heavy-duty freezer materials or store in plastic freezer bags.
Cool foods quickly before packaging. Don’t let food stand at room temperature longer than 30 minutes before freezing.
Freeze food as soon as it is cooled to room temperature (or refrigerate in shallow containers uncovered until cooled, then package and freeze).
Label all foods with recipe name, date, number of servings, thawing and reheating directions and “use-by” date.
Do not overload your freezer with new foods; add no more than 2 to 3 pounds of food per cubic foot of freezer capacity so air can circulate for proper freezing.
Leave space between packages so air can circulate around them.
If you are unsure about the quality of certain foods after freezing, freeze a small amount first and test for quality after thawing and reheating.
Frozen raw foods that have been cooked can be refrozen (i.e., fresh chicken —> packaged and frozen —> thawed —> cooked —> frozen —> thawed —> reheated).
You can refreeze unused portions of cooked foods that have previously been frozen and thawed in the refrigerator.
Seal containers with as little air as possible unless freezing liquid or semiliquid foods that expand when frozen. Leave a 1 1/2-inch space below the rim to allow for expansion.
When freezing casserole dishes or containers with empty space between the food and lid, fill “dead spaces” with crumpled wax paper.
Store food in 1-gallon freezer bags; press out all the air and seal tightly so bags can be stacked on top of each other.
Do not freeze tomato-based or other acidic foods in aluminum baking pans, or cover them with aluminum foil.
How to Prevent Freezer Burn:
Freezer burn occurs when foods are frozen for an extended period of time or not properly wrapped and sealed. Even though these foods do not pose any health risks, the freezer-burned areas will be dried out and tasteless. For best results, cut away freezer-burned portions before or after cooking.
When wrapping foods for freezing, get as much air out as possible so moisture cannot get in.
Vacuum-packing in FoodSaver® bags removes the air and keeps moisture out so foods can be frozen longer without freezer burn.
Use moisture- and vapor-resistant packaging that can be tightly sealed.
Thawing Foods Safely:

Refrigerate meat/poultry/seafood or casseroles 24 to 48 hours or until completely thawed. Foods thawed in the refrigerator can usually be safely refrozen without changing taste or quality.
Allow 8 hours per pound of meat.
Allow 4 hours per pound of poultry.
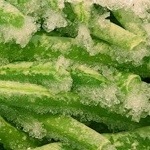
Allow 6 hours per pound of fruit or vegetables.
For fast thawing, place frozen packages in a watertight, sealed bag and cover with cold water.
Change water every 30 minutes until food is completely thawed.
In Microwave Oven:

Remove food from store wrapping (foam trays or plastic wrap) that may release chemicals into foods.
Allow 6 to 8 minutes per pound of food when thawing in microwave on low heat. Once food is defrosted, reheat on high heat.
Precooked foods low in moisture content (breads, cakes, cookies) can be thawed at room temperature.
Precooked foods higher in moisture content and/or containing dairy or egg products should be thawed in the refrigerator.
Microwave Reheating:
Cook until foods are steaming and hot (at least 165°F).
Cover foods with microwave-safe wrap; vent to prevent steam buildup.
Stir foods from the outside in to encourage even heating.
CAUTION: Be careful when opening microwaved plastic bags as steam can build up and cause burns when bags are opened.
When microwaving food in a FoodSaver bag, be sure to snip off a corner for venting.
Reheating:
Reheat all previously cooked food to an internal temperature of at least 165°F. The food must reach this temperature within 2 hours. If the food will not reach this temperature within 2 hours, reheat it in small batches to shorten the reheating time.
Use a clean meat thermometer to check internal food temperatures.
Reheating Frozen Food Without Thawing:
Bake at 300 to 350°F for almost double the original cooking time.
Cooking frozen foods at higher temperatures does not result in quicker cooking. Higher temperatures will cook the outside before the inside is completely thawed.
Leftovers:

*Leftovers should be refrigerated as soon as possible.
*Cut meat into slices (3 inches thick or less).
*Store leftovers in small, shallow containers to hasten cooling.
*Remove all the stuffing from turkey, chicken or meat and store separately.
What “Use-By” and “Sell-By” Labels Really Mean Use-By:

Food is no longer acceptable for consumption and should not be purchased or used after the given date.
Date of Pack or Manufacture: This date refers to when the food was packed or processed for sale.
Freeze food that will not be used within 3 to 5 days of purchase.
Freshness, Pull-or Sell-By: This refers to the last day that a particular food should be sold, but can be safely used for 1 week past the “sell- by” date (i.e., dairy and fresh bakery products).
Use Before or Best if Used By: This refers to the date at which food may begin to lose quality but can still be used safely (i.e., frozen foods, cereals, canned food, pasta, rice).
Top Timesavers:

*Fresh-cut and packaged, canned or frozen vegetables and fruits
*Jarred minced garlic or garlic powder instead of fresh garlic cloves
*Bottled marinades
*Shredded cheese
*Precooked chicken breast tenders, slices or cuts
Resource: Excerpted from Cook Once, Eat for a Week by Jyl Steinback. Copyright © 2003 by Family Fit Lifestyle, an Arizona Corporation.